When I was growing up in Gujarat, moong dal was never on the dinner party menu — it was too simple. It was the dal my mum made on Tuesday nights when everyone was tired, or the first thing she cooked after anyone came home sick. It took me years to understand that that simplicity was actually the point.
Moong dal tadka is yellow split lentils cooked until soft, then finished with a sizzling pour of whole spices bloomed in ghee. The result is light, deeply comforting, and ready in 30 minutes. No soaking required. One pot. And it pairs with nearly everything from plain rice to hot roti.
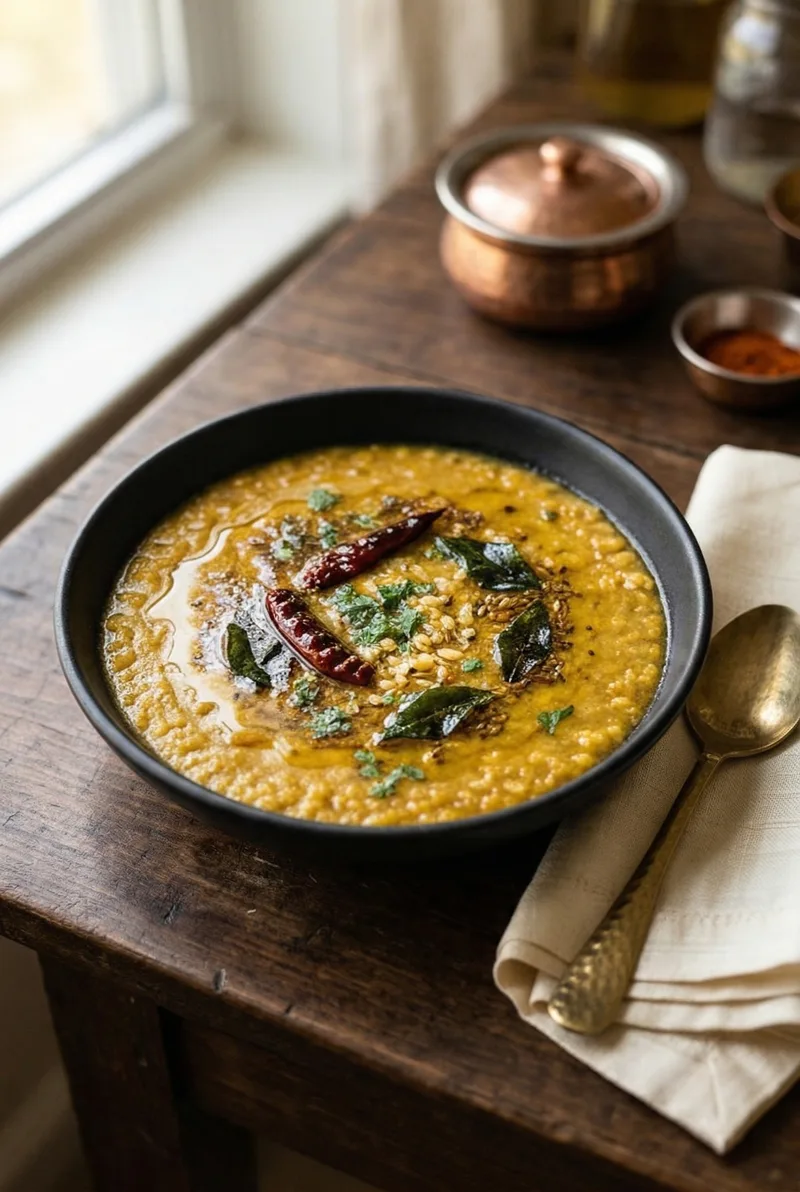
This is the version I grew up eating: a little ginger, a green chili, a tomato for body, and a tadka that goes into the pan with ghee, cumin, mustard seeds, and curry leaves until the whole kitchen smells like home. I’ve also included a no-onion-no-garlic version and a fully vegan swap so everyone at the table can have it.
What Is Moong Dal Tadka?
Understanding Yellow Moong Dal
Moong dal comes in three forms: whole green moong (sabut moong), split with the skin on (chilka moong), and split and hulled, which is the bright yellow variety we’re using here. Hulled yellow moong is the mildest, quickest-cooking lentil in the Indian pantry. It doesn’t need soaking, it cooks in under 10 minutes in a pressure cooker, and it has a soft, almost creamy texture when done.
It’s the go-to lentil in Ayurvedic cooking because it’s considered tridoshic — gentle on all body types — and it’s the first dal most Indian families introduce to babies. If someone in the house has an upset stomach or is recovering from illness, moong dal is almost always the first thing that comes out of the pantry. If you love dal recipes, our Palak Dal and Mag Ni Chutti Dal are worth bookmarking too.
What Is Tadka (Tempering)?
Tadka (also called chaunk or vaghar in Gujarati) is the technique of blooming whole spices in hot fat and pouring the fragrant oil directly over cooked food. The fat carries aroma compounds from the spices that don’t dissolve in water, so the tadka adds a layer of flavor you can’t get any other way.
For this dal, the tadka goes in at the end: ghee or oil in a small pan over medium-high heat, cumin seeds first until they darken and smell nutty, then mustard seeds until they pop, then dried red chili, curry leaves, and a pinch of hing. The whole thing goes over the cooked dal in one dramatic sizzle. It’s one of the most satisfying moves in Indian cooking.
Nutrition & Health Benefits
Yellow moong dal punches well above its weight nutritionally. One serving (approx. 1 cup cooked) delivers:
- ~12g plant protein — one of the highest protein lentils, great for vegetarian diets
- ~7g fiber — supports digestion and keeps you full longer
- Low GI — releases energy slowly, making it suitable for managing blood sugar
- Iron, folate & magnesium — important for energy, cell health, and muscle function
- Easy to digest — hulled and split, so lighter on the gut than whole lentils or beans
It’s the only lentil Ayurvedic practice recommends for all three doshas, which is why you’ll find it in sick-day cooking, baby food, and everyday family meals across India.
Why You’ll Love This Recipe
- Ready in 30 minutes, start to finish
- One pressure cooker or Instant Pot, minimal cleanup
- Naturally gluten-free and easily made vegan
- High in plant protein and fiber, gentle on digestion
- No onion-no garlic version included for navratri and everyday satvik cooking
- The kind of dal that tastes even better the next day
Ingredients

For the Dal
- 1 cup yellow moong dal (dhuli moong dal), rinsed well
- 3 cups water
- 1 medium tomato, chopped
- 1 inch fresh ginger, grated or minced
- 1-2 green chilies, slit
- 1/2 tsp turmeric powder
- 3/4 tsp salt, or to taste
For the Tadka
- 1.5 tbsp ghee (or neutral oil for vegan)
- 1 tsp cumin seeds
- 1/2 tsp mustard seeds
- 1-2 dried red chilies
- 8-10 fresh curry leaves
- 1 pinch hing (asafoetida)
- 1/2 tsp red chili powder (optional, for extra heat)
Vegan swap: Replace ghee with coconut oil or refined sunflower oil. The tadka will be slightly lighter in flavor but still delicious.
No onion-no garlic (satvik/Jain): This recipe is already onion-free. Simply skip the garlic if you use it, and use hing generously — it provides a similar savory depth without any alliums. Perfect for navratri or any day you’re keeping satvik.
How to Make Moong Dal Tadka
Stovetop Pressure Cooker Method
- Rinse the moong dal 2-3 times until the water runs mostly clear.
- Add dal, water, chopped tomato, grated ginger, green chilies, turmeric, and salt to the pressure cooker.
- Cook on medium-high heat for 3-4 whistles, then lower the heat and cook for 1 more minute. Turn off and let pressure release naturally.
- Open the cooker and whisk the dal gently with a spoon. It should be soft and smooth. If it looks too thick, add 1/4 cup hot water and stir to combine. Adjust salt.
- Transfer to a serving bowl or keep on low heat while you make the tadka.
Instant Pot Method
- Rinse the dal and add it to the Instant Pot with water, tomato, ginger, green chilies, turmeric, and salt.
- Set to Pressure Cook (High) for 8 minutes. Let the pressure release naturally for 5 minutes, then quick release.
- Open and whisk the dal. It should be completely soft. Adjust consistency with water if needed, adjust salt.
- Use the Sauté function on low to keep the dal warm while you prepare the tadka separately.
Making the Perfect Tadka
This is the step that makes the dal. Don’t rush it.

- Heat ghee or oil in a small pan over medium-high heat. You want it hot but not smoking.
- Add cumin seeds. They should sizzle immediately and turn golden within 30-40 seconds. If they don’t sizzle, the oil isn’t hot enough. If they go black in seconds, the oil is too hot.
- Add mustard seeds. They’ll start popping within 15-20 seconds. Stand back slightly.
- Add dried red chilies and hing, stir once.
- Add curry leaves — they’ll spit because of moisture, so be ready. Stir for 10 seconds.
- Add red chili powder if using, stir once off the heat to avoid burning.
- Pour the entire tadka directly over the dal. The sizzle you hear is exactly right.
Common mistake: Burning the cumin. If it goes from golden to black, start over. Burnt cumin turns bitter and will ruin the dal.
Variations
No Onion-No Garlic (Satvik / Jain) Version
This recipe is already onion-free. For full satvik cooking, skip the garlic (this base recipe doesn’t include it anyway) and increase hing to a generous 1/4 tsp — it brings a savory, slightly pungent depth that fills in the gap. This version is ideal for navratri, ekadashi, and regular satvik days. The dal tastes lighter and cleaner, which is exactly the point.
Vegan Version
Swap the ghee for refined coconut oil or sunflower oil in the same quantity. The tadka will be slightly lighter and the aroma will differ, but the technique and result are almost identical. If you want a richer flavor, use a combination of coconut oil and a small amount of sesame oil.
Serving Suggestions
This golden dal is endlessly flexible. A bowl with instant pot jeera rice, a papad, and a simple cucumber raita is a complete weeknight dinner that takes 30 minutes total and uses one pot. It’s the kind of meal my mum could pull together on a tired Tuesday and somehow still make feel like proper dinner.
Additionally, here are other pairings that work well:
- Plain steamed basmati rice
- Soft phulka or paratha
- Gujarati thali style: dal with roti, bhaat, shaak, and papad
- As a soup-like bowl on its own, with crusty bread if you’re going for a fusion angle
The dal reheats beautifully and thickens overnight in the fridge. Add a splash of water when reheating and it comes right back.
Storage and Make-Ahead Tips
Fridge: Store in an airtight container for up to 4 days. The dal will thicken as it sits — add a splash of water when reheating.
Freezer: Freeze in portions for up to 3 months. Thaw overnight in the fridge and reheat on the stovetop or microwave.
Make-ahead trick: Cook the dal base a day ahead and refrigerate. When you’re ready to serve, reheat the dal and make a fresh tadka right before serving. A fresh tadka on day-old dal tastes just as good as making it from scratch.

Moong Dal Tadka Recipe

Moong Dal Tadka
Ingredients
Method
- Rinse the moong dal 2-3 times until the water runs mostly clear.
- Add dal, water, chopped tomato, grated ginger, green chilies, turmeric, and salt to the pressure cooker (or Instant Pot).
- Stovetop: Cook on medium-high heat for 3-4 whistles, then lower the heat and cook for 1 more minute. Turn off and let pressure release naturally. Instant Pot: Set to Pressure Cook (High) for 8 minutes. Let the pressure release naturally for 5 minutes, then quick release.
- Open and whisk the dal gently. It should be soft and smooth. If too thick, add 1/4 cup hot water. Adjust salt. Keep warm on low heat while you make the tadka.
- Heat ghee or oil in a small pan over medium-high heat. You want it hot but not smoking.
- Add cumin seeds — they should sizzle immediately and turn golden within 30-40 seconds.
- Add mustard seeds and wait for them to pop, about 15-20 seconds. Stand back slightly.
- Add dried red chilies and hing, stir once. Add curry leaves (they’ll spit — be ready). Stir for 10 seconds.
- Add red chili powder if using, stir once off the heat. Pour the entire tadka directly over the dal. The sizzle means it’s perfect.
Notes
Frequently Asked Questions
What is the difference between moong dal tadka and dal tadka?
Dal tadka usually refers to toor dal (yellow pigeon peas) with a double tadka finish, typically restaurant-style. Moong dal tadka uses yellow split moong, which is lighter, milder, and quicker-cooking. Both use the tadka technique, but the base dal and the resulting texture are quite different. Moong dal is gentler on digestion and has a softer, almost silkier consistency.
Can I make moong dal tadka without onion and garlic?
Yes, and this recipe is designed for it. This dal is naturally suited to satvik cooking. The base already has no onion. Skip any garlic (this recipe doesn’t use it) and increase the hing slightly. You’ll still get a deeply flavored, aromatic dal.
Is moong dal tadka vegan?
It becomes vegan with one swap: replace ghee with a neutral oil or coconut oil for the tadka. The rest of the recipe is already plant-based.
Why is moong dal so easy to digest?
Yellow moong dal is hulled and split, which removes the outer skin that’s harder to digest. It’s also low in complex oligosaccharides compared to other lentils, which is why it causes less bloating. In Ayurvedic cooking it’s classified as a tridoshic food, meaning it’s gentle on all body types. It’s the first lentil given to babies and the first food recommended during illness or recovery.
Can I use whole moong (sabut moong) instead?
You can, however the result will be different. Whole green moong has the outer skin intact and takes much longer to cook (soak for 4-6 hours first). The texture is heartier and less creamy. If you want a similar vibe with whole moong, that’s closer to a moong dal fry than a tadka dal.
How do I get the dal to the right consistency?
Immediately after pressure cooking, moong dal looks quite liquidy but thickens fast as it cools. Whisk it once while hot to break down any whole pieces, then judge the consistency at serving temperature. If it’s too thick, add hot water a little at a time and stir. If it seems too thin right after cooking, let it sit for 5 minutes uncovered on low heat — it will thicken.
This is one of those recipes I come back to every week without thinking about it. It doesn’t ask much from you, and it gives back more than it should — warming, nourishing, and something the whole family will actually eat.
If you try it, I’d love to know — did you go with ghee or the vegan version? Did you serve it with rice or roti? Leave a comment below and tell me.
Made this? Share a photo and tag @petitepaprika on Instagram — I love seeing your kitchen creations!
